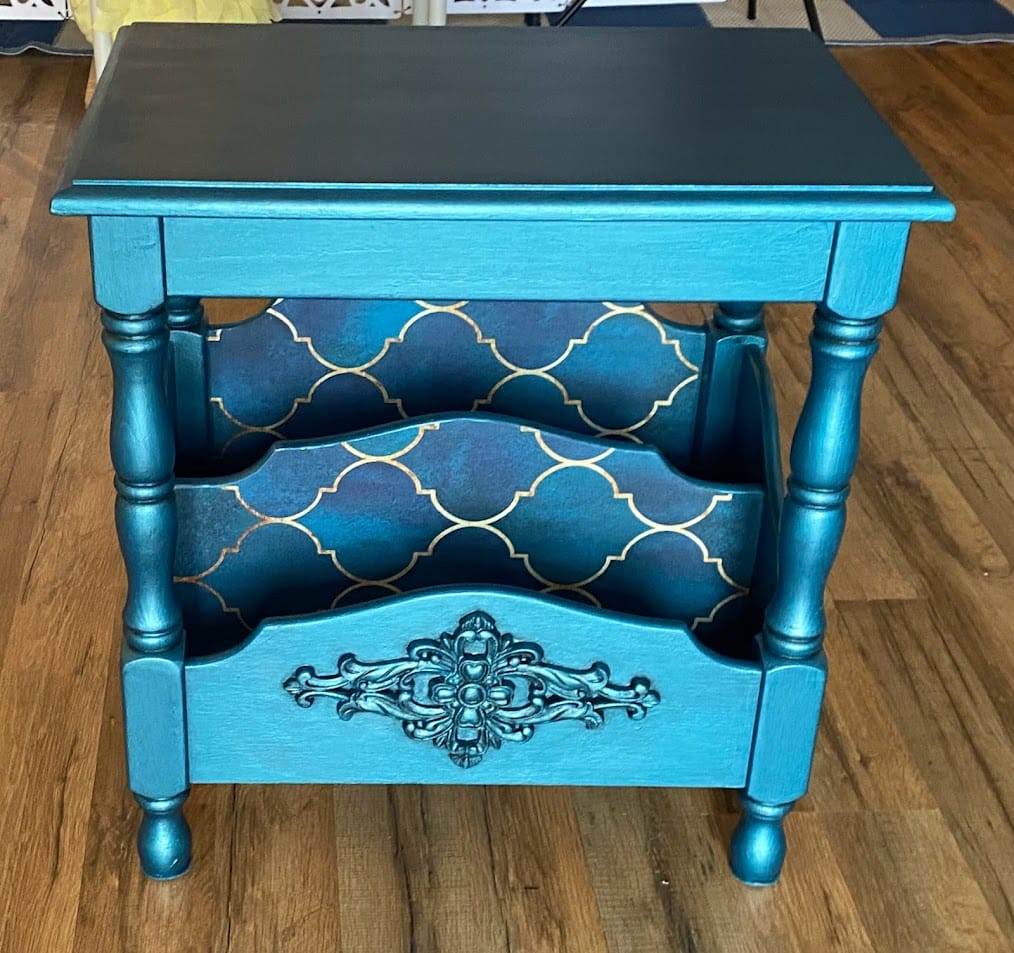
I have been asked to explain the process I used to get from the “Before” to this finished beautiful little table. Keep in mind the 3 P’s – Prep, Paint, Protect! So here goes – –
Prep
I started by cleaning the table thoroughly with a TSP solution, and then rinsing to get off any residue. This takes care of all the things that ending up sticking to a piece of furniture over the years. TSP is a great degreaser and cleaner. Next I sanded it 3 times, first with an 80-grit sandpaper, then 150-grit, and finally 220-grit. This sequence flattens out the finish and then gradually smooths it to a very smooth level that holds paint really well. Because the table is small, I was able to do all the sanding by hand rather than the electric sander.
Paint
First I added the wood applique to the front. I bought it ready-made and glued it on. Then I applied a base color of chalk paint that matches the final color – 2 coats. Then I applied the pretty metallic paint – also 2 coats. Metallic paint tends to be very thin and anything under has a tendency to show through, and that is why I wanted to paint the base color in a matching color first. I also applied peel-and-stick wallpaper to the insides of the insert pieces. I just measured it, applied it, and then cut the top with a boxcutter to fit the curves of the inserts themselves.
Protect
This involved applying 2 coats of “satin” topcoat to the entire table and finally an extra coat to the top. The last thing I did was apply some black gilding wax to the applique and the rings on the legs to add some character, depth, and a bit of patina to the piece. The black wax also serves to tone down the brightness of the metallic paint just a bit.
That’s it! For those who are really interested in this process, I hope this is a bit helpful. I will soon be trying my hand at creating a video so you can visually follow the process on a new piece of furniture.

